
We know there are many things at the beginning , so lets do small list of tasks:
-
- Overview: Open the box and check all the content , be sure everything you order is there.
- Installation: Fit the Magic Pod to your mast by hand (dont screw it) to check if everything fits correctly , you can follow the specific guide here https://www.flow-custom.com/magic-pod-quick-start/
- Check how the leash works in case you want to use it into back pack.
- Remove the Rotor of the motor pulling straight, to know how it works.
- Install the batteries inside the box to be familiar with it, , the box must close without force, close by hand instead of using the latches , if is ok use the clatches and screw provide as extra safety (not necessary to be thigh) . ALWAYS Disconnect the batteries from the Box after a session.
- Turn on the remote controller, check everything is working fine, (new v3 remotes have “lock” trigger , to unlock press brake trigger for few seconds.
- NEVER Spin the motor on dry for more than few seconds and NEVER full RPM
- Every time at the beach: Doble check box is close correctly , and wire , leash is attached correctly .
- NOTE : 99% of problems are caused by user mistakes, remember YOU ARE INSIDE THE WATER WITH BATTERIES AND ELECTRONIC!!!, fails by customer negligence are NOT under Warranty !!
-
-
Main Menu:
- First Time Setup
- The Magic Pod
- High Power Charger
- Remote v3
- Maintenance and Cares
-
- All the videos have multi-language subtitles, 1.Settings/subtitles/spanish autogenerate 2.Settings/subtitles/Auto Translate/select your language
-
-
First Time Setup:
- The Propeller is usually shipped un-screwed to the the Rotor, (If you receive it screwed remember to un-screw monthly for maintenance adding grease or tef gel to avoid galvanic corrosion)
- Please Assembly together as showed:
- ( IS NOT NECCESARY TO REMOVE THE BLADES TO INSTALL THE PROPELLER) , the blades are screwed and glued from factory for better long lasting, however it can be replaced and the tool is included, but is not necessary or recommended for first time assembling .
More info about Propeller follow the Propeller Guide
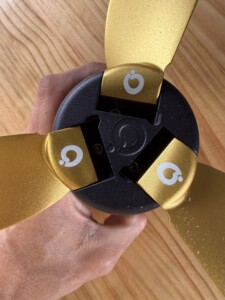
- Align the 3 screws with the rotor threads
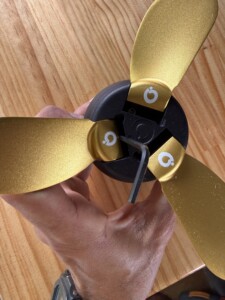
- Start by screwing the Left screw 4 times 360º clockwise, continue with top and bottom ones (4 times), Go back to left one, and complete the screwing, complete the screwing of the top and bottom ones.
The Blades usually are shipped well cleaned, however is always a possibility that were shipped straight form factory and possible have rests of the anodized process that can create cavitation under use, usually it will remove it self after on or 2 sessions, but you can also clean the surface with alcohol if you experiment that issue. NOTE cavitations can comes from different points, blades, wire, pod, even the electric tape wrapping the wire and mast.
-
-
Installing the motor:
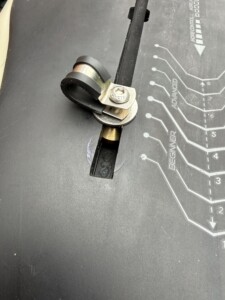
-
- Install the T nut before the mast, right or left track depending on your surfing stance, goofy or regular
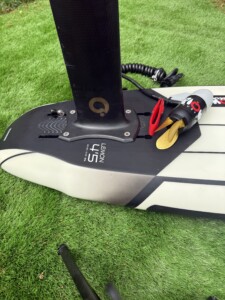
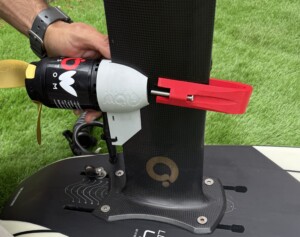
- Install the Magic Pod, choose the right nose, _(short or long) depending on your mast chord, choose your motor height, fasten the screws (no to much)
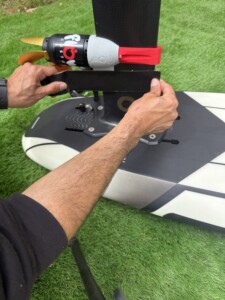
- Secure the Pod using Duct Tape, or electric tape.
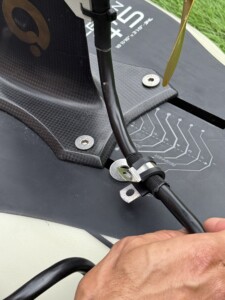
- Slide the wire protection depending on your position, install the clamp, use the whaser provide between the clamp and the board.
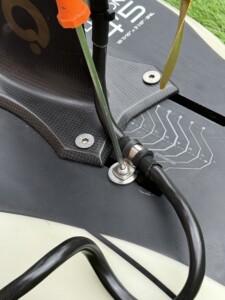
Trimmig the leash…
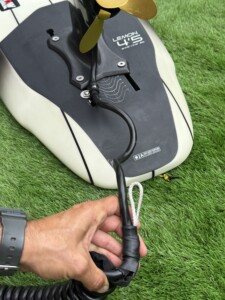
- The low Knot with the loop is not Fasten by factory, each customer have to slide it through the wire depending on the board tail, the knot must be at least 5cm far from the leash plug distance, to fasten the knot pull hard form both sides (loop and leash) to secure the knot into the position
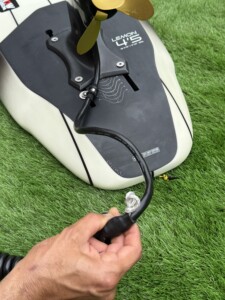
- Make a double loop and attach it to your knot plug leash
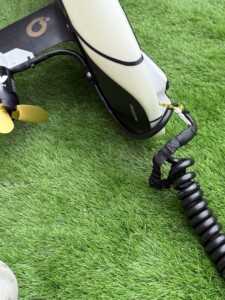
- Pull from the wire and be sure the leash plug is holding the strength ,.
Pro tip to keep the wire straight under the board and avoid any propeller damages:
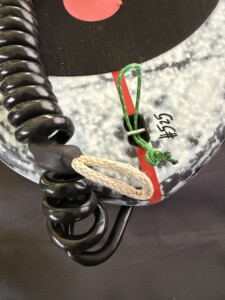
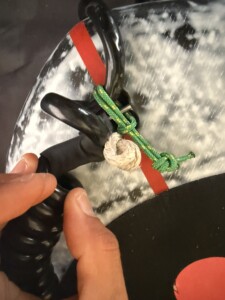
Pass the wire through the plug pigtail leaving the knot to the end, connect the dyneema loop of the leash to the pigtail knot. (leave 1 or 2 wire loops from the plug to the dyneema loop)
-
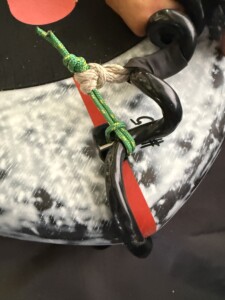
-
The Backpack
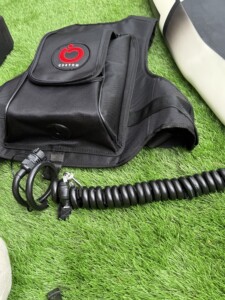
- Without Box inside pass the wire through the hole.
-
-
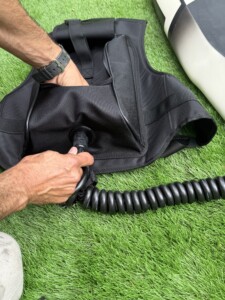
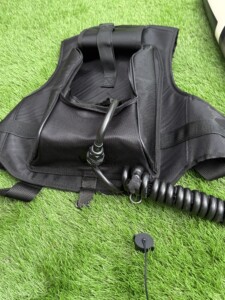
- Install the box and connect the motor
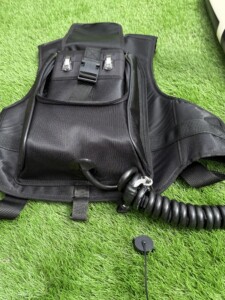
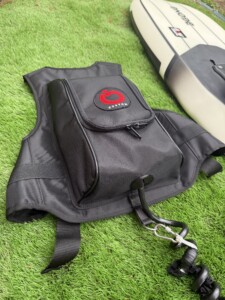
-
- Attach. the leash.
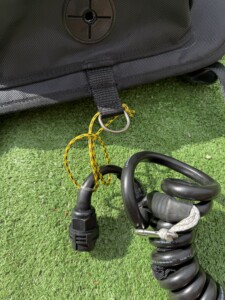
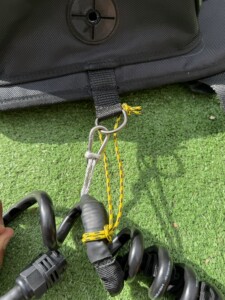
- We add extra rope as second safety for the backpack, this rope allows to still hold a pull if the hook, Ring, breaks , please always use it at the pictures below:
-
High power Charger
Connect the Long Range Battery, fast check about cells voltage. (the Long Range battery have 12 cells, displayed at the charger once connected, check all values are equal or close.
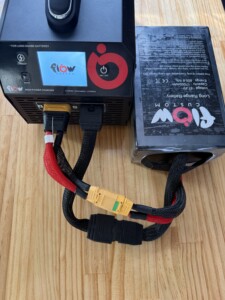
Turn on the Charger at the switch behind
-
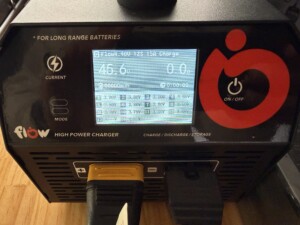
- Charge mode: Use the Mode button to select charge mode, click on On button to confirm.
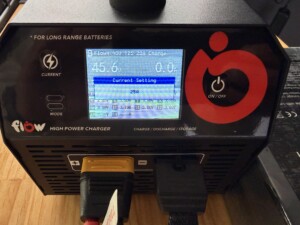
- Current Mode: Use the current mode button to adjust the charging speed, our charegr and battery are suitable for fast charging, however 15A is the default value, we highly recommend to use this setting to keep the battery life longer, if you need express charging increase the power .
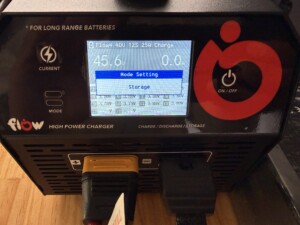
- Storage Mode : Use Mode Button to select Storage mode, using this setting the charger will charge/discharge the battery until 60-70% for safety storage, use this mode in case the battery is fully discharge and is not gonna br used soon , or if is fully charged and finally you dont use it, (dont store the battery fully charged for more than 1 day)
- Long Press On/off to start the selected mode, Long click to stop the process .
-
Remote V3 User Manual.
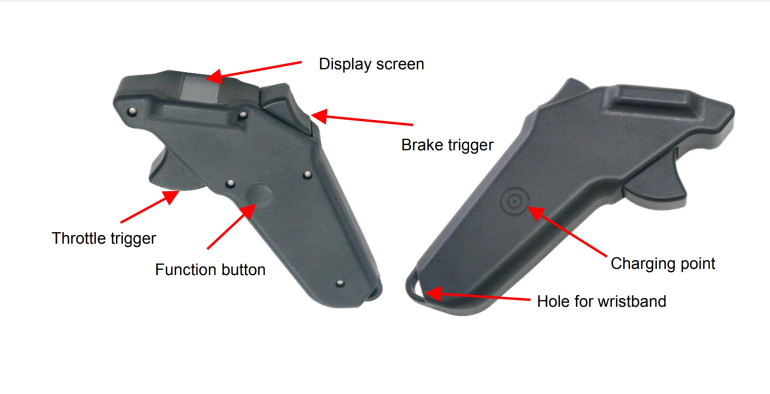
The Remote is ready to be used from Factory, however is important to learn how to change the settings at the Menu or just modify under your preferences:
How to Turn On/Off : Long Press on “function button”
- How to unlock the Trigger: When LCK is displayed the remote in “Locked”, long press at the brake trigger to unlock.
- How to Get into “Menu”: Hold “brake trigger” and one click “function button” , once menu is displayed release “brake trigger”
- Menu Options:
- 1. 1st Speed set : set the maximum throttle for SP1,
- 2nd Speed set: set the maximum throttle for SP2. ,
- 3rd Speed set: set the maximum throttle for sp3
- 4. Pair : Pair the Remote with the unit
- 5. Calibration: Calibrate the triggers
- 6. Data source: Select “None” Default
- 7. VESC Thr: Select “none” Default
- 8. Thr Lock : Time in seconds for Trigger auto Lock , select your preference or OFF
- 9. RF Mode : transmitting power for remote connection: Eco will safe remote battery, Pro will give stronger Connection.
Once into “Menu” is important to understand how to move, the only button needed is the “Function” one, short click will slides into menu options , Long click will set / Confirm, Brake trigger to go back.
Main screen display: you can display the Throttle percentage or by one short Click “function” button changer to Battery Remain Percentage:
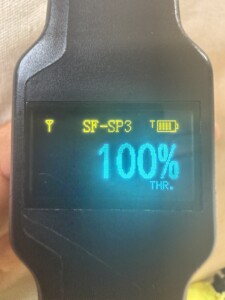
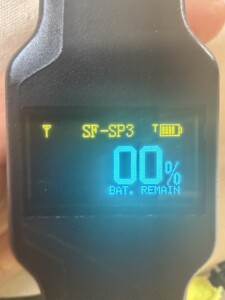
Speed modes:
There are 3 speed modes that you can select or swap from the main screen (2 short clicks at “funtion” button) , at the top of the screen you can see “SP1” means you have selected Speed 1, To know how much is the throttle limit on each speed, (batteries disconnected at the box) Press full trigger and the maximum throttle percentage will be displayed.
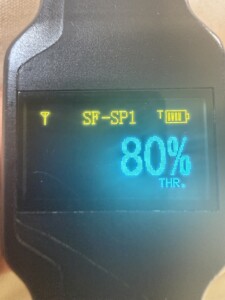
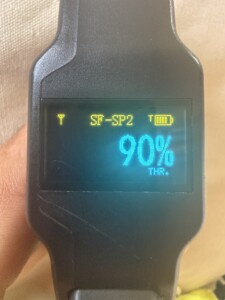
- How To Pair the Remote: (the remote is linked to your box from factory, but sometimes you must have to link them again.)- Batteries must be disconnected at the box IMPORTANT !! IT DOEST WORK IF BATTERIES ARE CONNECTED BEFORE
– Go to menu (hold brake trigger and click ON button)
– Select “pair” , Long press On button, when “pairing…” is displayed connect the batteries 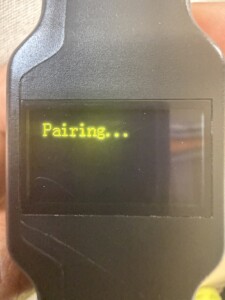
– Connect the batteries at the unit, “pairing” will disappear , press brake trigger to go back to main screen.How to change the time of Trigger AutoLock: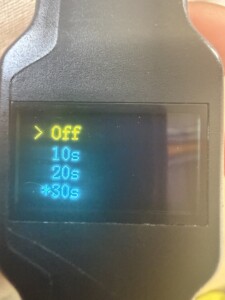
- – Go to menu
– Short clicks with ON, until remote display shows “Throttle lock”
– Long press “FUNCTION”
– SHORT Clicks on button to adjust the seconds
– Long Click ON to confirm
– Press brake trigger to go back to main screen.Important notes:- When remote battery shows 2 bars it needs to be recharged (if battery goes to 0% the remote may not charge again, and needs to be replaced)
– Dont leave the remote charging more than 4 hours.
– Always submerge the remote and shake it with fresh water after every use.Maintenance and Cares
The good maintenance and cares of the gear is really important to preserve it well.
– Before session:
Always double check box , leash and knots.
Check the motor is spinning well and smooth.
On case of using backpack check the leash is well trimmed.
Close the box , submerge into the water and check any water filtrations.– After Session:
Disconnect the batteries from the box.
Remove the rotor of the motor, by straight pulling.
Rinse and submerge rotor, motor, and remote in fresh water, and let it dry.
Spray Wax Film protector provided at the motor and rotor, (Fluid film, wax film….spray lithium grease also works if you cant find anything else)
Keep the box open to allow humidity and condensation due to dry